Annotation Label Printing
This page describes how to print annotation labels in a Symbiota portal.
To use this tool, you will need to have first added the annotated specimens to the annotation print queue. This can be done either individually, via the Occurrence Editor, or in batch using the Add Batch Determinations/Nomenclatural Adjustments tool (see Annotations/Determinations for instructions).
To print annotation labels, navigate to the Data Editor Control Panel (My Profile > Occurrence Management > name of collection) and click “Print Annotations Labels.” A table will be displayed that lists all the specimens in the Annotation Print Queue. Check the boxes in the leftmost column next to the specimen records for which you wish to print annotations.
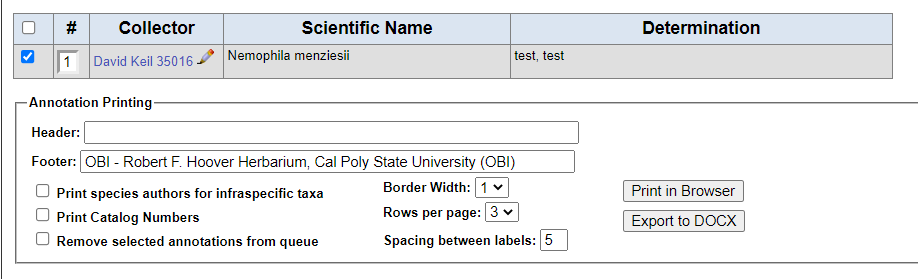
To view a specimen record, either click the collector name and number (to view public record display) or click the pencil icon next to the collector name and number (to view occurrence editor for that record).
Customize your annotation label using the provided options and select either Print in Browser or Export to DOCX (to export as a Microsoft Word document).
Check the box next to “Remove selected annotations from queue” to remove these specimens from the print queue after you click one of the print buttons.
Cite this page:
Katie Pearson. Annotation Label Printing. In: Symbiota Support Hub (2021). Symbiota Documentation. https://biokic.github.io/symbiota-docs/editor/label/annotation/. Created on 22 Nov 2021.