GEOLocate CoGe
The GEOLocate Collaborative Georeference Tool (CoGe) can be activated and integrated in a Symbiota portal to engage multiple users in a central georeferencing platform outside of the portal. More information about this platform can be found here: GeoLocate CoGe page.
A webinar introduction to CoGe can be found here.
The general steps for a CoGe workflow are as follows:
- Create a profile in the CoGe website
- Create a community on the CoGe website
- Add members to your community in CoGe
- Add data to the CoGe community from your Symbiota portal
- Have members georeference in the CoGe web client.
You can either have data pushed to CoGe directly from your Symbiota portal, or you can download records as a CSV file, upload them to CoGe, download them once they are done, and then re-upload them to Symbiota. However, if you push data to CoGe directly, all georeferences made in CoGe will be automatically applied to your records in the Symbiota portal. Updates will be “live” in the portal.
A manual for collections managers/administrators using the Collaborative Georeferencing (CoGe) tool can be found here: https://epicc.berkeley.edu/wp-content/uploads/2015/11/UsingGeoLocateforCollaborativeGeoreferencing_2016.pdf. This manual covers steps 1-3 in the above workflow, but does not cover how to add occurrences to CoGe from a Symbiota portal. Video tutorials can be found here: https://www.geo-locate.org/community/default.html.
Instructions for step 4 are provided below.
Example instructions for step 5 can be found here (GEOLocate CoGe Training Course), and a written protocol can be found here (GEOLocate CoGe Protocol).
Pushing Specimens from a Symbiota Portal to GEOLocate CoGe
(step 4 from above workflow)
- Navigate to your Administration Control Panel (My Profile > Occurrence Editor > name of collection).
- Click Processing Toolbox.
- If CoGe has been enabled for your portal, a tab labeled GeoLocate CoGe will be visible. Click this tab. If CoGe is not enabled, contact your portal manager to request this feature.
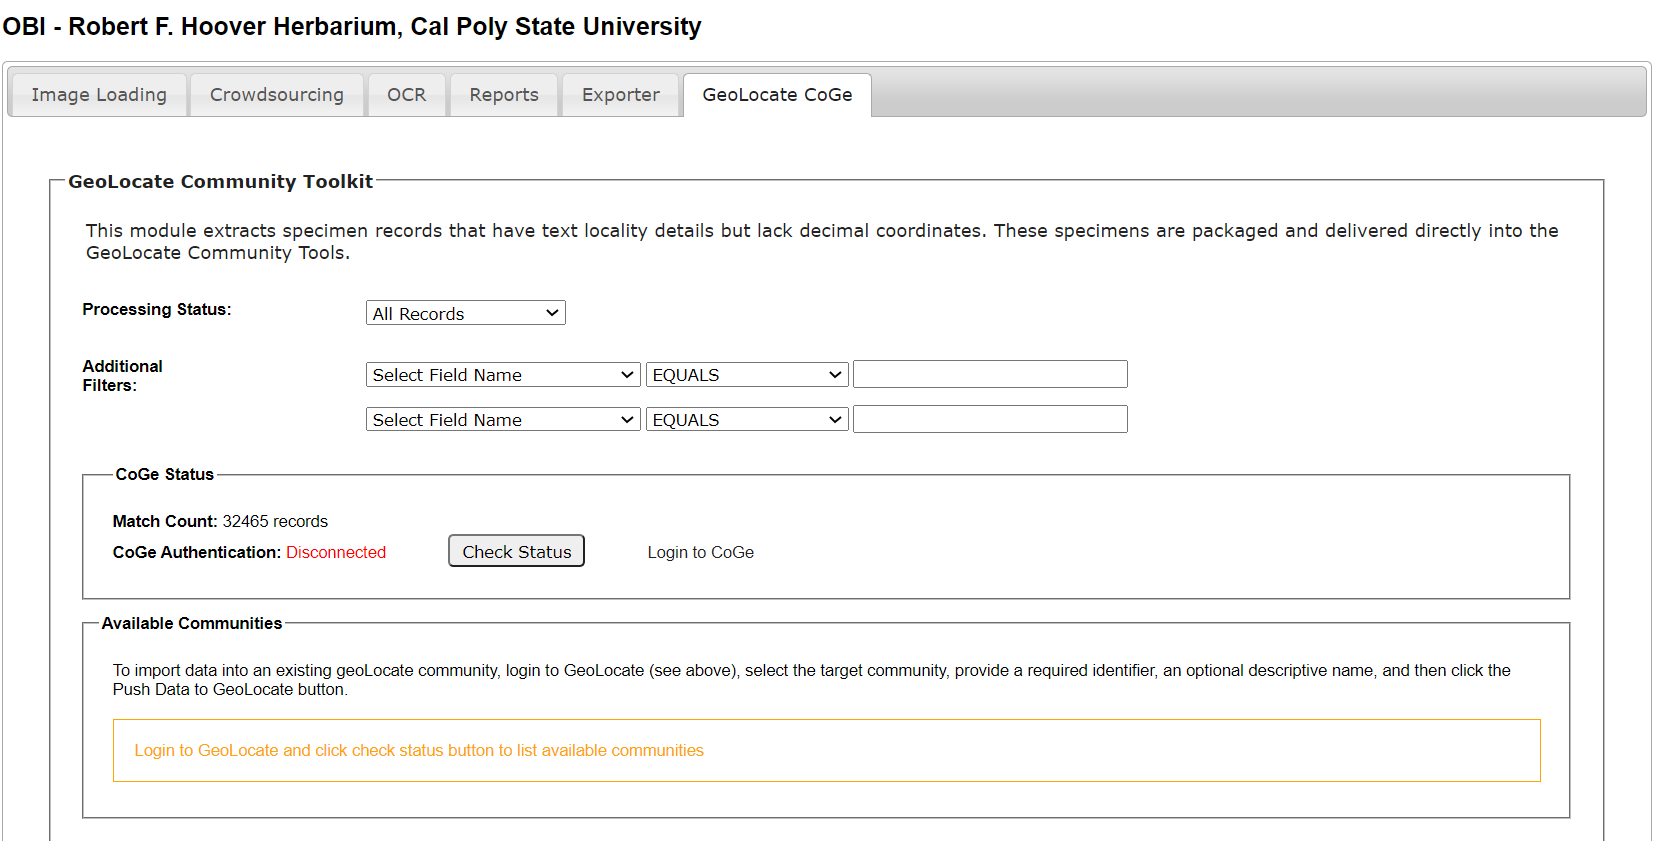
- Click Login to CoGe in the CoGe Status box on the resulting page and log in to CoGe using your CoGe user account information in the pop-up window/tab.
- Return to your Symbiota portal page.
If you have previously logged in to CoGe, click the Check Status button instead of logging in. If “Connected” does not show up in green after clicking this button, try logging out and then logging back in to CoGe. If this still does not work, check with your portal manager to ensure that your portal is set up to interact with CoGe.
- The CoGe communities that you manage will now be listed in the Available Communities box. If no communities are visible, make sure that you have created a community on the CoGe website.
- At the top of the page, use the Processing Status and/or additional filters to search for the records you would like to push to CoGe (i.e., that you would like to be georeferenced in the CoGe client). Once you have entered the search parameters/filters, click out of this field, and you will see how many records were found in the CoGe Status box under Match Count.
- In the Available Communities box, click the radio button next to the CoGe community to which you would like to assign the records.
- Enter a brief name for the data set in the “Data source identifier (primary name):” box and a description, if desired.
- If you would like the georeferences from CoGe to be automatically applied to their records in the Symbiota portal, click the “Push Data to GeoLocate CoGe” button. If you plan to use the download (Symbiota -> CSV), upload (CSV -> CoGe), download (CoGe -> CSV), upload (CSV -> Symbiota) workflow, click the “Download Records Locally” button.
You can also use the “Download Records Locally” button to quickly check whether the specimens that you are pushing to CoGe are as expected.
- Return to the CoGe site, navigate to your Dashboard, click the name of the community to which you just pushed records, and click the GO TO COMMUNITY button.
- Click the name of the dataset that you just pushed to CoGe.
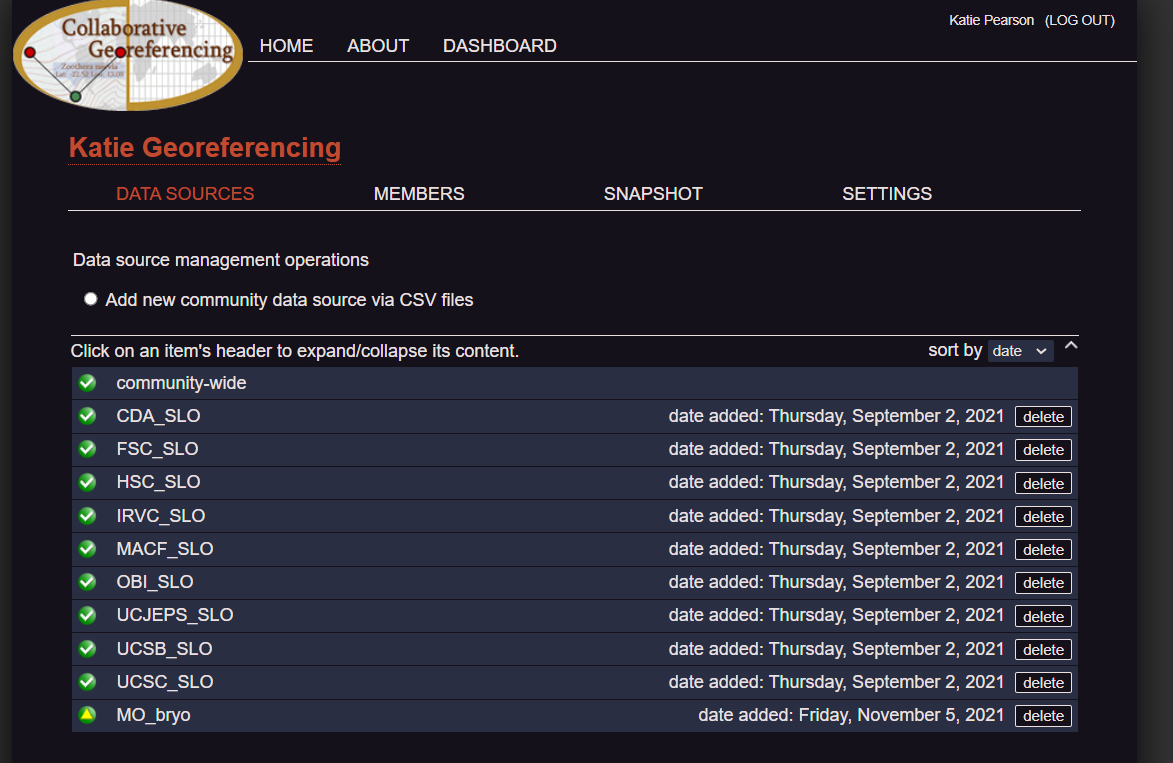
- Click the Update Cache button.
- Once the cache has been fully updated, they will be available via the CoGe web client.
Reviewing Georeferences Created in GEOLocate CoGe
- To view georeferences that have been created in CoGe, navigate to your Administration Control Panel (My Profile > Occurrence Editor > name of collection).
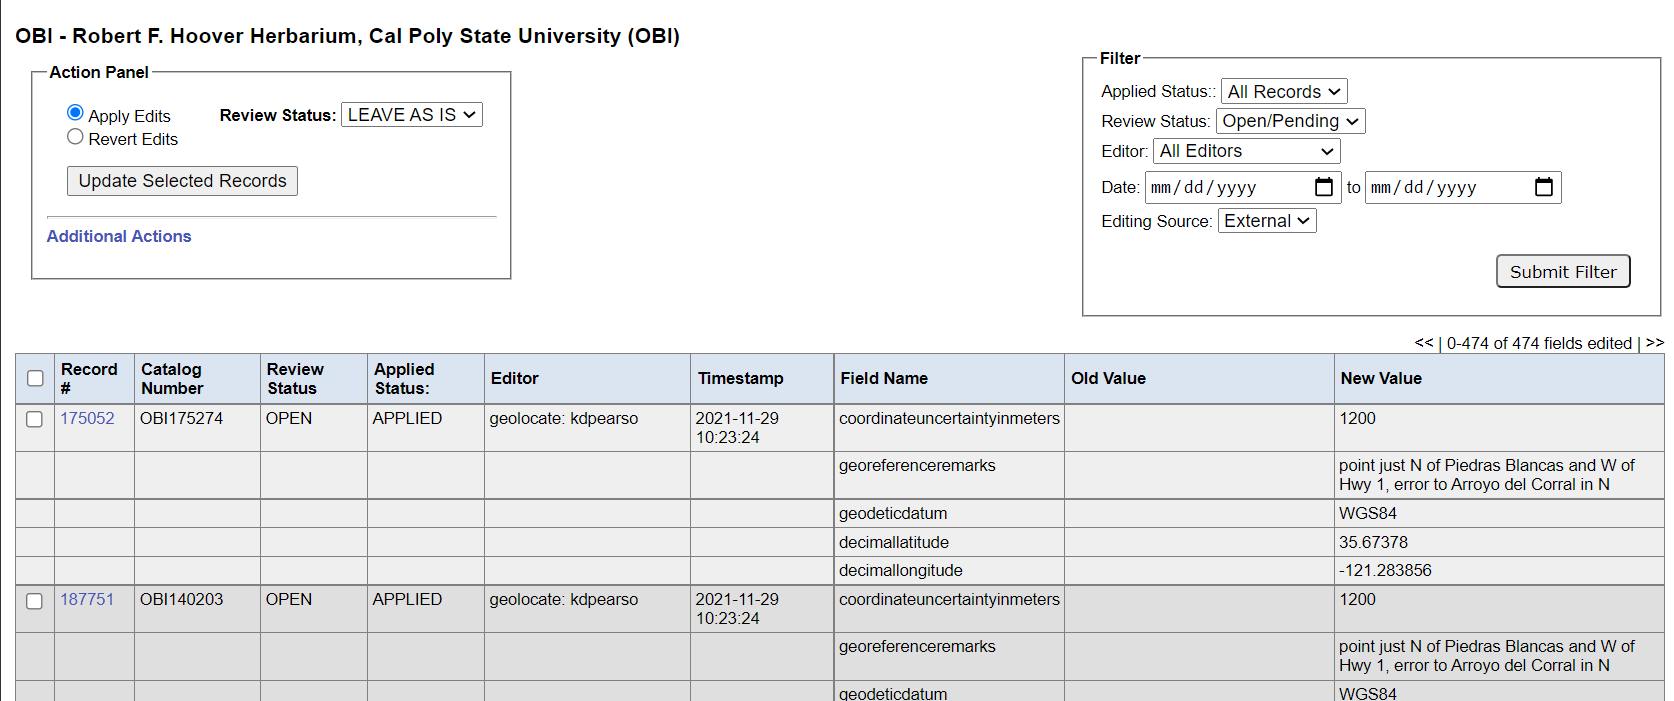
- Click Review/Verify Occurrence Edits.
- In the Filter box at the top right, select External from the dropdown menu of the Editing Source field. Then click Submit Filter.
- The edits that were applied in CoGe will now be visible in the reviewer table.
Cite this page:
Katie Pearson. GEOLocate CoGe. In: Symbiota Support Hub (2021). Symbiota Documentation. https://biokic.github.io/symbiota-docs/coll_manager/georeference/coge/. Created on 02 Dec 2021.